Handcrafted violin maker by day, CNC operator by night

handmade purism vs precision in machining

So this week, I began evening classes at Symbol Training to learn how to operate CNC machines. Quite the opposite end of the spectrum from violin making school, where I am not even allowed to touch the bandsaw. I don’t specifically know what I intend to do with all this training in architecture/design, fine woodworking, and CNC, but it sounds like a good combo for making something really awesome one day. Maybe. But pshh, do I really have to pick a side anyway?? I didn’t think so.

And now, some photographic proof to corroborate the claims made in above illustrations:

graduated spruce plate
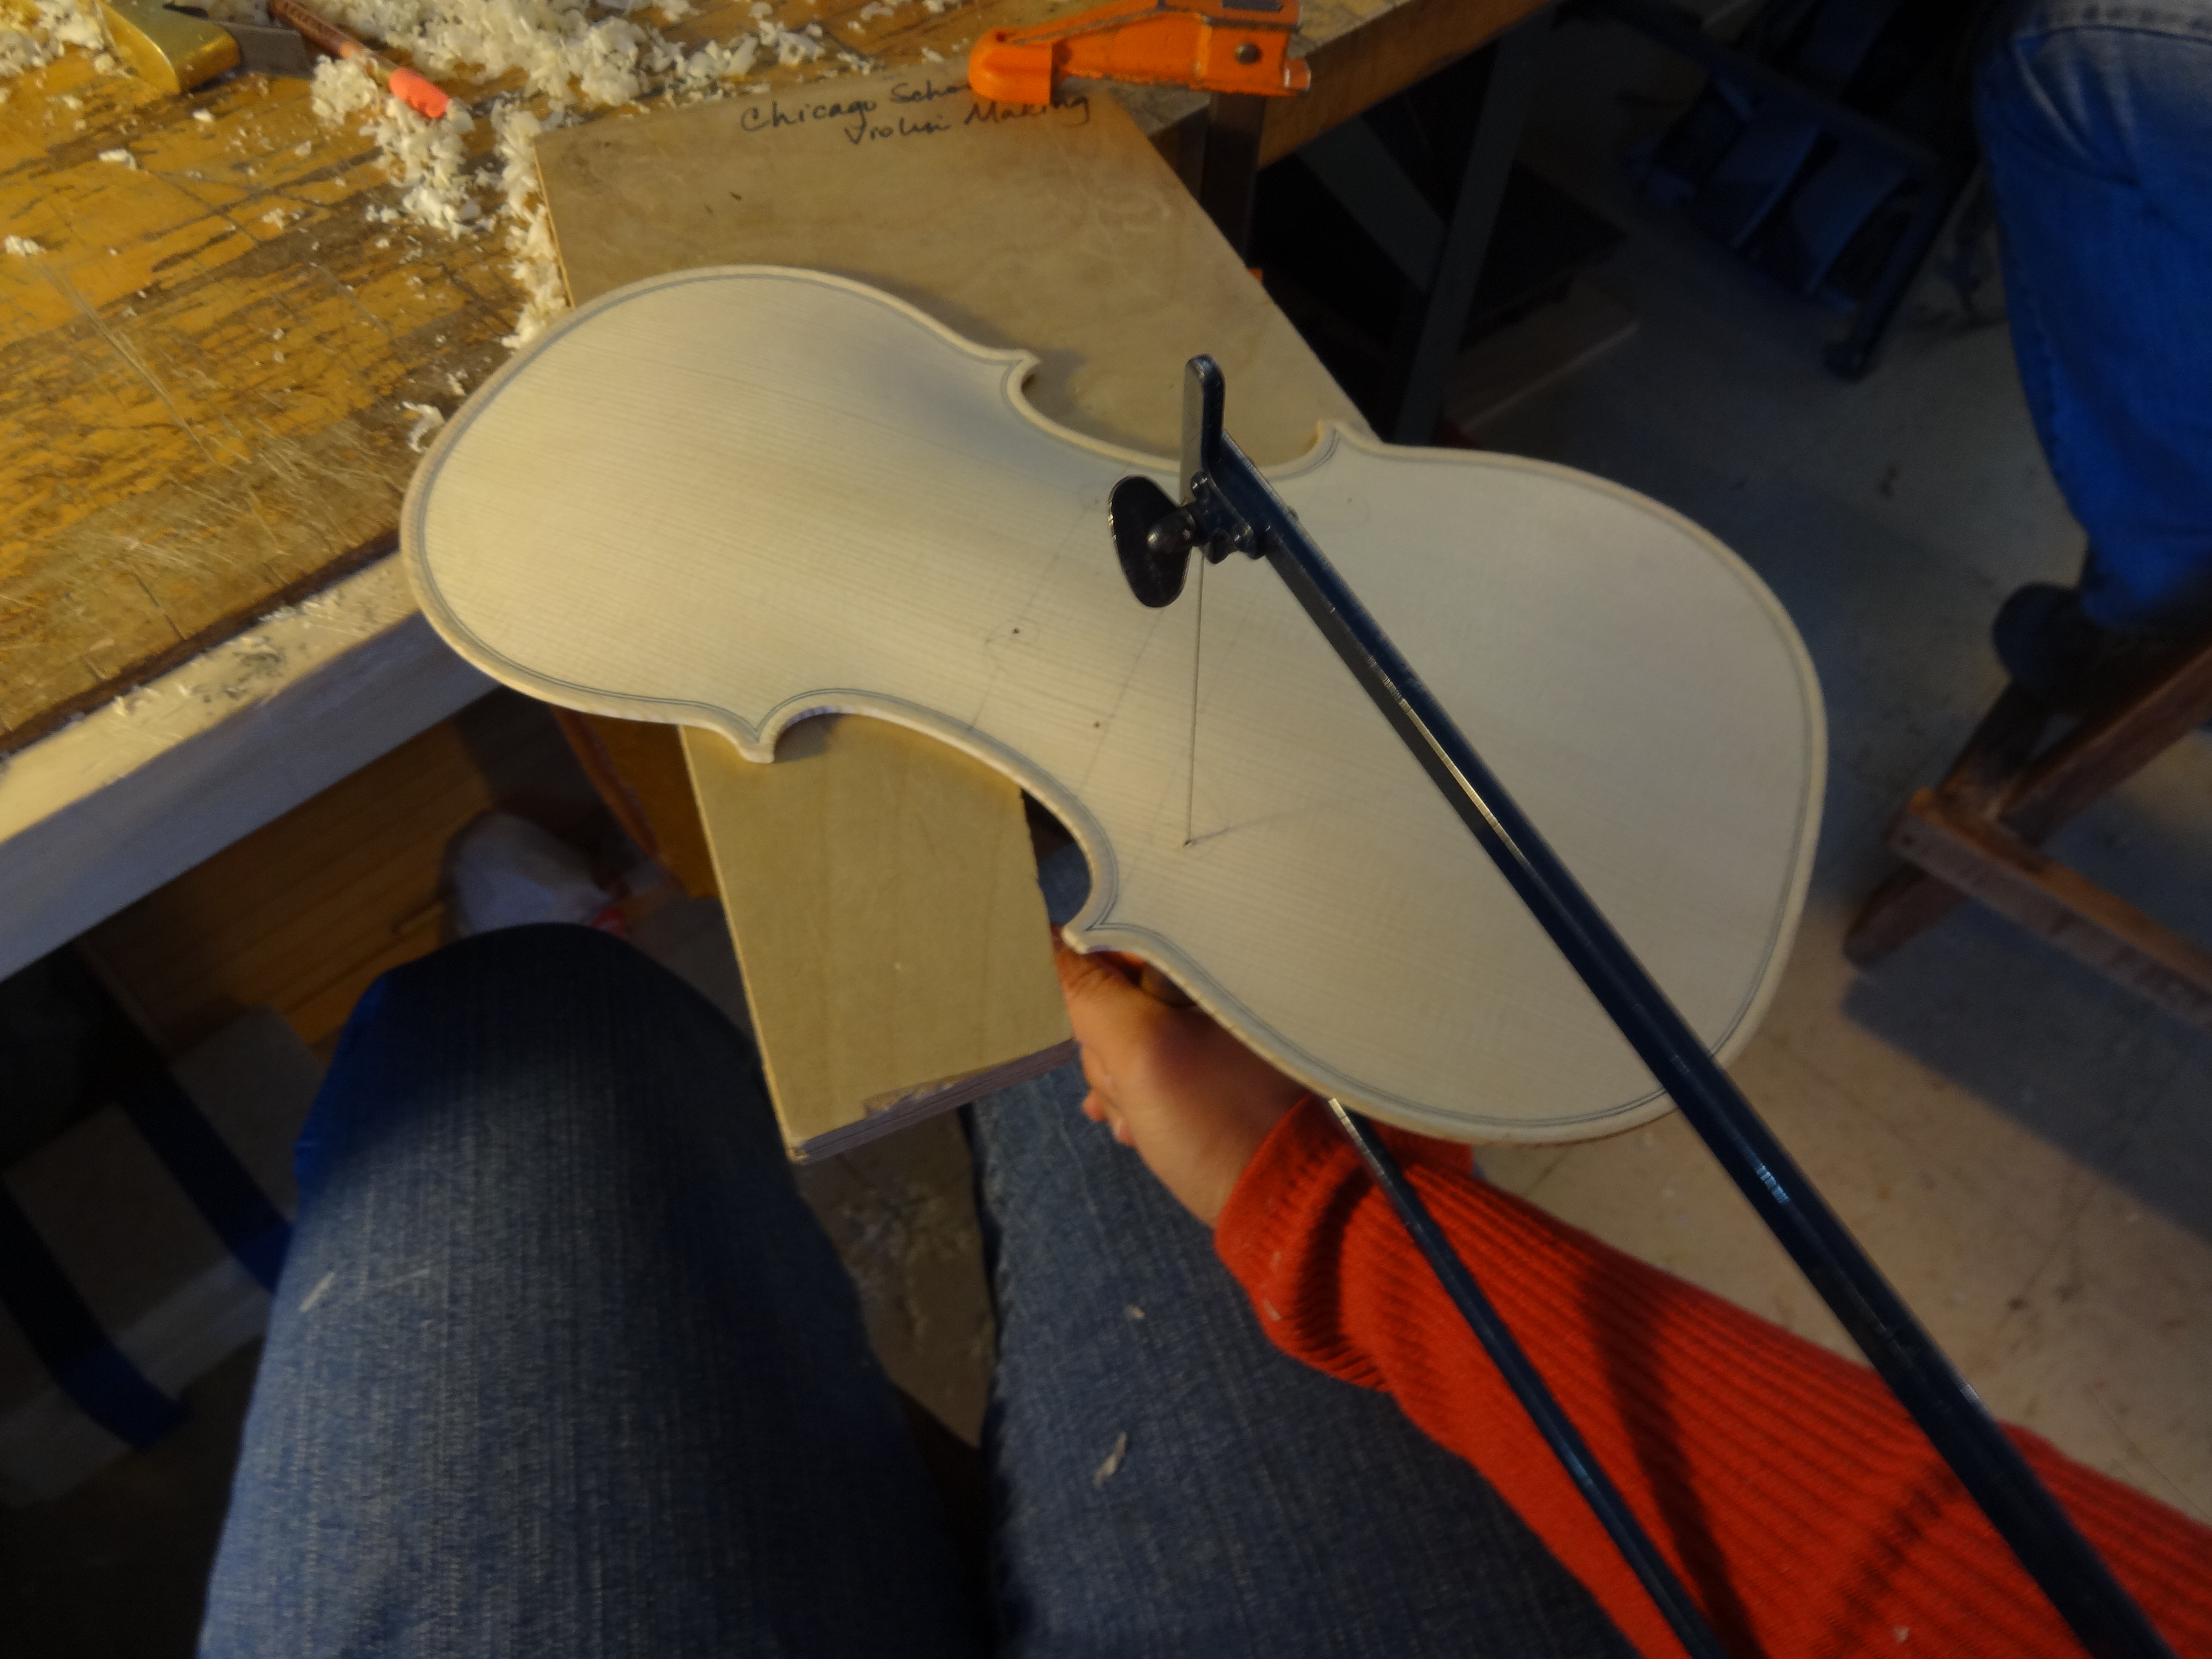
This is my spruce plate after it was attacked by a fleet of little round-bottom finger planes. It is about .2mm away from final dimensions here, and I will scrape it to achieve the final thickness.

reading spruce plate thickness with light
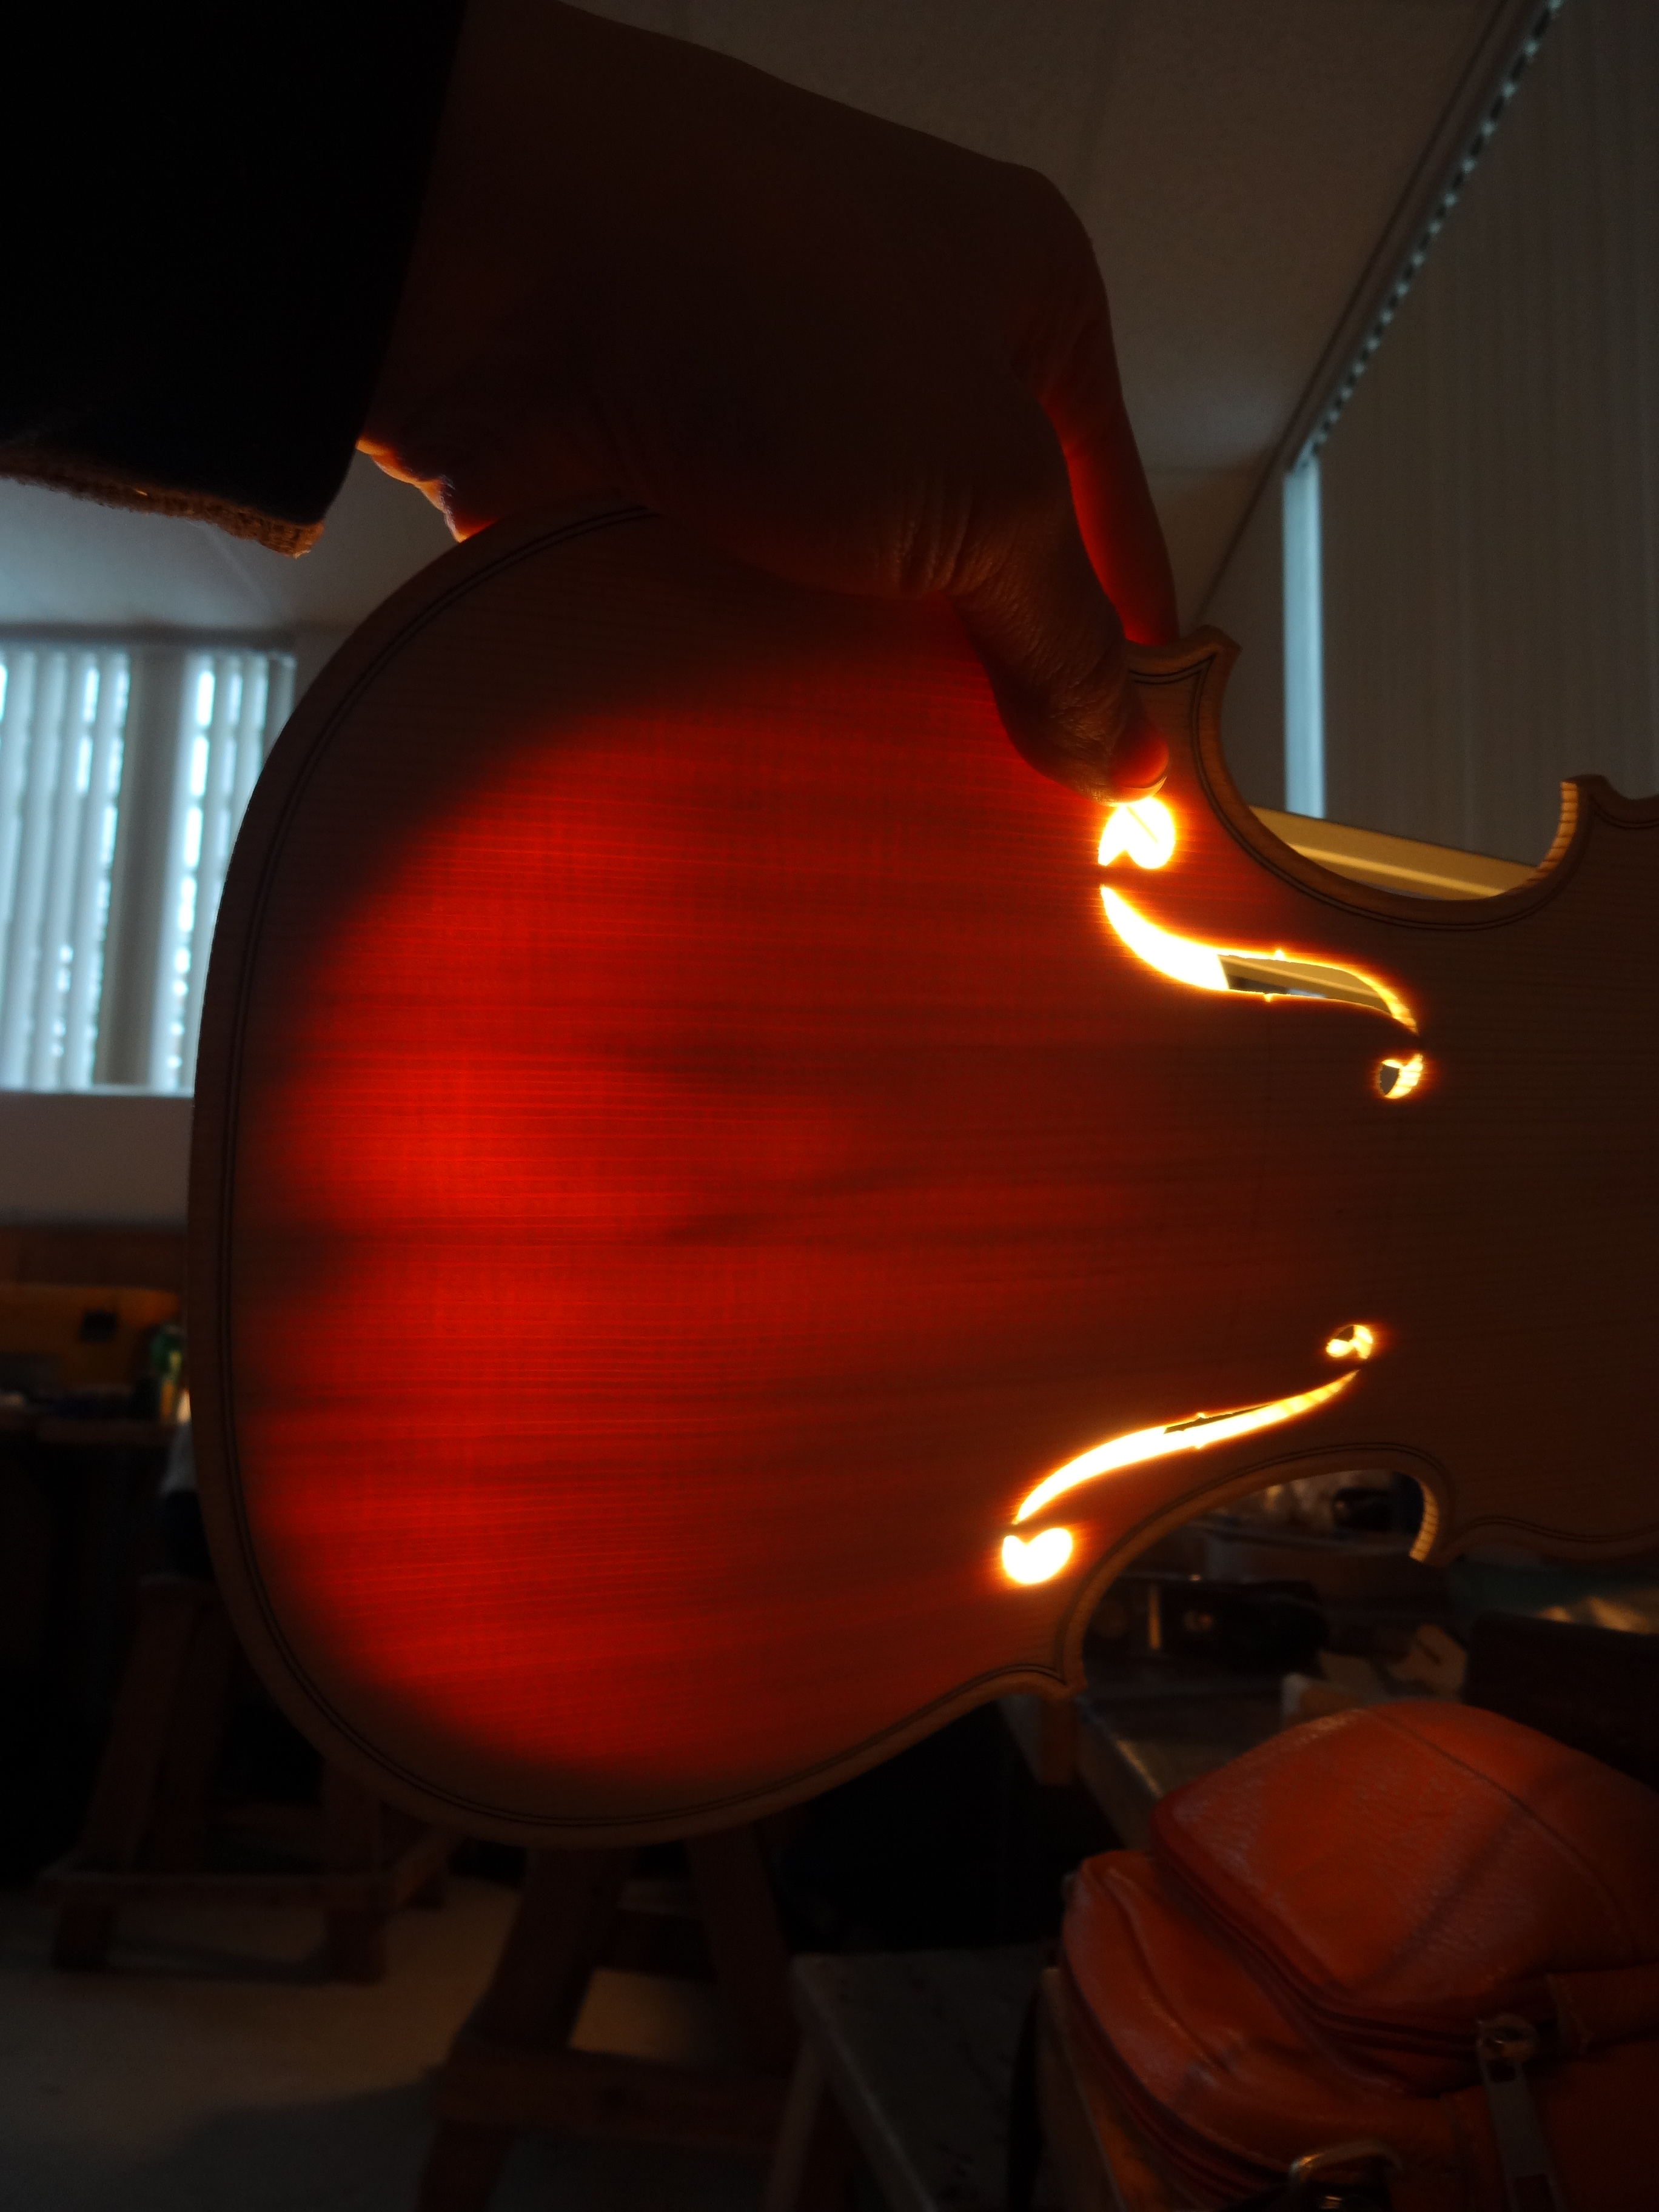
It’s unsettling at first, but quite a bit of light passes through that piece of spruce as it approaches final thickness. Take that, Alice Tully Hall!

aluminum cut-off from first day of cnc shop class
This coin, which I cut off from a cylindrical stock of aluminum spinning in the lathe (Manual Direct Input! T02 S1500 M03! Insert! Hand jog, .001, x-axis!), is my token of inauguration into the world of CNC machining. What in the world have I gotten myself into??

Wedding Gift for Nora & Kevin, part 2

More pictures & process of making the inlaid tea tray. Check previous post for the rest.

STEP ONE: Join 3 pieces!

glue up rig for joining boards

STEP TWO: Plane it down til the boards are flat enough to lay out your design. Cut it out with a knife & ruler!

cut channel walls for inlay with knife and ruler

STEP THREE: Pick it out with a purfling pick! No routers or dremels if you want to be hardcore.

purfling pick makes inlay channel

STEP FOUR: Bend some walnut strips on the steaming iron so you can get those little tails to work! Trim, fit, and glue!

bocote + walnut inlay

STEP FIVE: Plane it flat! Why is my plane clogging and not working well? Maybe because it is hoarding shavings for the winter!

plane hoards shavings for the winter

STEP SEVEN: Cut out all the rest of the pieces, shape, rasp, file, scrape, and sand!

tea tray parts assembly

STEP EIGHT: Assemble!

tea tray wedding gift underside

Oh yeah, why did I make a tea tray, you ask? Originally, Nora asked me to make a sign to put next to the guestbook.

I got carried away.

But it is still a sign! The legs are cut at an angle to keep the tray’s center of mass where it needs to be to stand up like a sign.

angle for something to stand up on its side

Nora & Kevin : Sign has been sealed and delivered, it’s yours. Yall’s. Whatever. Happy Marriage!

tea tray wedding gift

Wedding Gift for Nora & Kevin

tea tray wedding gift for nora and kevin

My dear friend got married and I presented the couple an offering of tray-shaped wood. The tray is Bocote (which smells exactly like pickles when planed), the trim and legs are Goncalo Alves, and the inlaid letters are strips of walnut. Here’s what I learned from this project.

tea tray assembly axo

I made this up as I went, changing the plan five times a day. This is usually not recommended, but in the end, the schematics happened to work out beautifully. I have recently been obsessing over how to fasten tabletops to table aprons and how to handle joinery between boards with different grain orientation. The issue:

wood shrinkage and expansion across grain is greater than with grain

Wood happily expands and contracts (shut up, Omobono) with humidity and temperature. But it doesn’t shrink uniformly across all three dimensions. The biggest dimensional variation is ACROSS the rings of the tree, and the most stable dimension is along the length of the wood grain. The tea tray by nature is already subject to temp & moisture fluctuations – it might get washed, hot liquids might spill on it, it might live in Houston…. we must not let poor choice of joinery be another reason for warp:

expansion and contraction on wooden boards

Note: the downside of slot & pin is the ends of the crossing piece may not stay flush to the edge of the board. In the case of this tea tray, it is not functionally crucial that they stay flush. A cupped tray would be far worse. So basically, the board is sandwiched but can move freely between the differently-oriented legs and trim, and that trim piece is further held down in this sort of lap joint thing:

tea tray wedding gift joint detail

So, hopefully this will make sense now:

tea tray assembly axo - glue joints tea tray assembly axo - do not glue zones

More tray stuff to come on Wednesday!

Please feel free to comment if you’d like to elaborate on this wood expansion/contraction topic, pick on the design of this tray, commission something from me (yes! come on, pleeease 🙂 ?), or whatever!

Antonio Stradivari & his incompetent sons #1

33 incompetent sons

Many of my non-violin making friends giggle at the mention of “f-holes.” But you know what makes me giggle? Antonio Stradivari had a son named Omobono! What an absurd name! Apparently, his sons got lazy and rode on their father’s fame and fortune. Yolo, Omobono, yolo. Isn’t that right? (note: I despise that acronym. Also, in this case, I would refute yolo, because about half of Antonio’s ~1200 violins still live on.)

F-holes:
rough saw f-holes with fret saw and the tiniest blade ever

practice f-holes:
DSC02774