Top Secret Notes On…

free ideas and ways to do things… follow at your own risk

Operation help-Max-get-chickens, part 2

The $100 tractor for three chickens

Today we discuss the making of the chicken tractor, without the drama.

chicken tractor overview, with scalies

Bill of Materials

The following chart is what it would cost, not what we paid. We spent a bit more (sorry, Max), because we bought extra of a few things (mainly OSB, due to errors and then design changes). Though we also made use of scrap or leftovers from previous projects.

 
material unit cost quantity subtotal
Pressure-treated 2×4, 12′ $5.57 3 $16.71
2×3, 8′ $1.92 5 $9.60
OSB 7/16″, 4′ x 8′ $8.45 1 $8.45
Corrugated Metal Roof Panel, 26″ x 8′ $19.49 1 $19.49
1″ Teks Roofing Screws with neoprene washers (box of 120) $9.88 1 $9.88
2.5″ Exterior Wood Screw (1 lb box) $6.71 1 $6.71
1″ Exterior Wood Screw (1 lb box) $6.71 1 $6.71
1/2″ Hardware Cloth, 3′ ~$2.00 / lf ~11 ft ~$22.00
3″ Strap Hinges (pack of 2) $3.27 1 $3.27
TOTAL     $102.82

(Nerd note: I’ve always wanted to use an html table in an appropriate context!!! ie not for formatting my angelfire/geocities pages 10 years ago!)

Other stuff we used that may or may not cost ya:

  • Drill, circular saw, mitre saw
  • Staple gun for mounting hardware cloth
  • Metal-cutting blade for circular saw
  • Egg drawer!
  • Nice big branches for roost sticks
  • It’s a good idea to prime or paint the wood with something, especially the OSB, and especially especially where ever the OSB was cut.

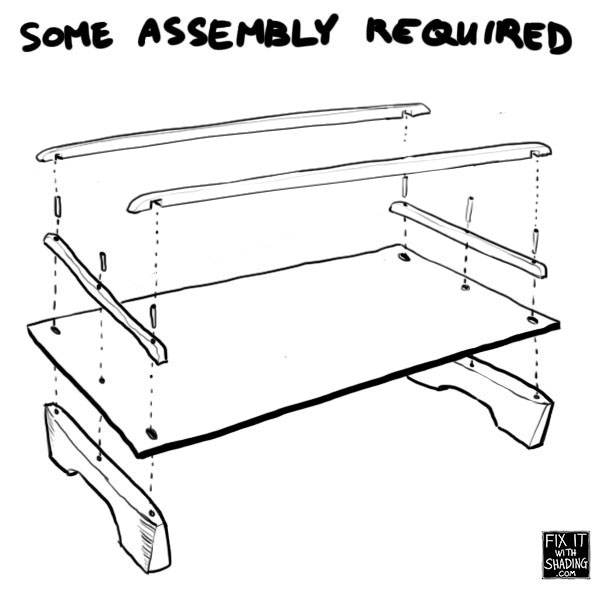
Some Assembly Required

Chicken tractor construction, animated in gifs.

1. Partial A Frame

1 chicken tractor a frame construction
Floor size: 3′ x 6′
Height: ~3′
For 3 chickens, this is a bit on the small side.
The run area is 3′ x 4′.

2. Chicken House Frame-up

2 chicken tractor house frame-up
That OSB wall and its little mini-studs were assembled before sliding into place on the A frame.

3. Perimeter Cladding

3 chicken tractor perimeter close-off
Tediously cut your hardware cloth with wire cutters. Careful! It’ll draw bloood. Staple directly onto the frame.
Roost access door is strap hinged.

4. Corrugated Metal Roof

4 chicken tractor corrugated metal roof installation
This was our first experience with sawing through metal and using those Teks screws with built-in squishy stuff to prevent leaking through the roof.

5. Egg Drawer

chicken tractor egg drawer
We ripped this drawer from my sister’s old kitchen counters. The box itself is about 11″ x 18″.

6. Insert Chickens

chicken tractor just add chicken
The coop is a bit tight, but miraculously, even the puffball Buff Orpington can fit down the 8″ ramp, and through the tiny door (which is maybe an 10″ high triangle.)
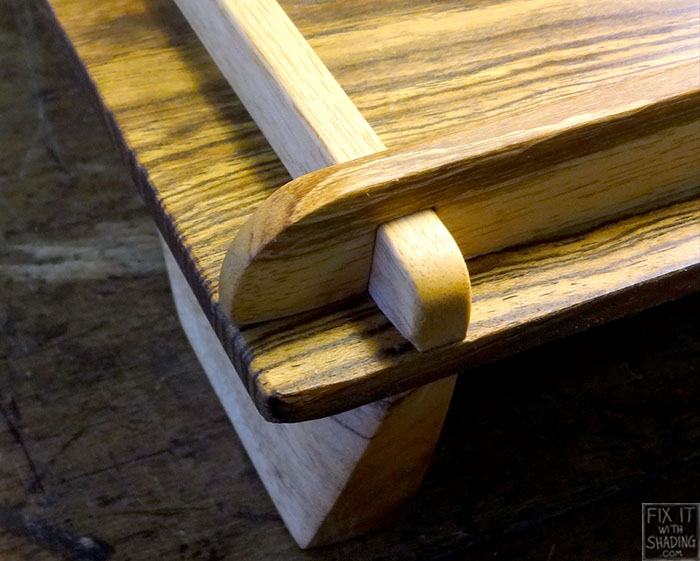
More Photos

chicken tractor construction

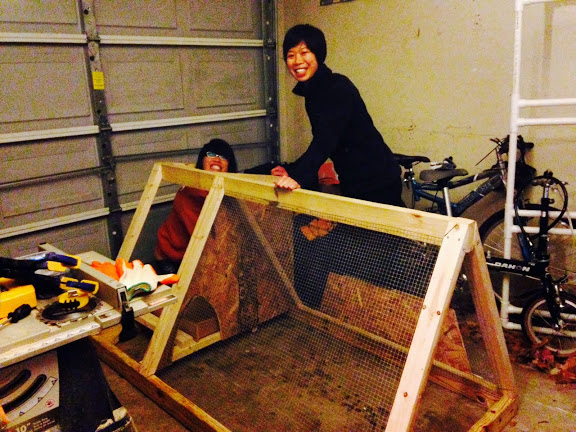
In case you forgot, it rained, so we took the job inside.

chicken tractor construction i can't fit through the door

Peek-a-boo. See? The tiny door prevents human-sized predators from crawling in and attacking them in their chicken house at night.

chicken tractor outdoor roosts

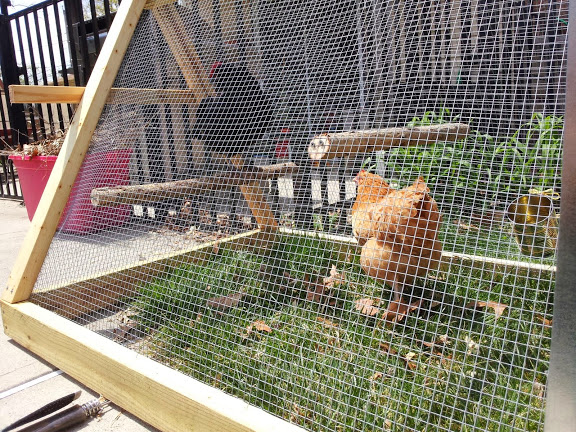
Ameraucana and Buff Orpington hanging out, and a shy Rhode Island Red hiding inside.

chicken tractor overview

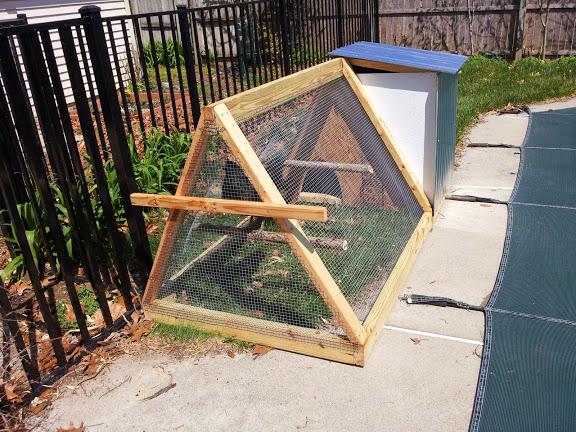
Ta-da! All nice and… half-primed.

I’m still on session break from violin-making school, so violin-related posts will resume next week. Can’t wait to see my möbius strip bass bar!

In the meantime, next post will STILL be about chickens — troubleshooting and accessories.

Chinese food scavenger hunt

Alright, people, count up your points.

My oldest sister just got back from her first trip to China. I threw together a food-related scavenger hunt for her, and she brought it back with check marks (and a few corrections and edits by real Chinese people). There are of course many many many things missing, but it’s all that popped in my head in the hour before she left. Also, my handwriting looks worse than a 4-year-old’s.

sichuan dry pot 麻辣香锅

sichuan dry pot mala xiangguo 麻辣香锅

starring:
腐竹 tofu skin
海带 seaweed
山药 yam thing that I’d never had before going to China
莲藕 lotus root
chicken wings

skewers 串

skewers chuan'r 串
starring: squid! roaches! silkworms! saury fish!

various fruits 水果

various fruits shuiguo 水果

starring:
榴莲 durian菠萝蜜 jackfruit
火龙果 dragonfruit
百香果 passionfruit
金橘 kumquat
杨梅 some kind of berry

various meats / bbq 烧肉

various meats and bbq shaokao 烤肉

Main blundering error here is where I wrote “barbecue hunger” instead of “barbecue goose.”

松树鳜鱼 squirrel fish
红烧肉 red braised pork
澳门烧肉 macau roast pig
烧鹅 bbq goose (… not hunger)
烧鸭 bbq duck

sticky rice in a leaf 糯米鸡 / 荷叶饭

sticky rice in a leaf nuomi ji 糯米鸡 heye fan荷叶饭

and now for some odd pairings:

pineapple bun 菠萝饱 / thousand year egg 皮蛋

pineapple bun boluo bao 菠萝饱 thousand year egg pidan 皮蛋

pumpkin and lily petals 南瓜百合 / yak yogurt (yunnan) 牦牛酸奶

pumpkin and lily petals nangua baihe 南瓜百合 yak yogurt from yunnan maoniu suannai 牦牛酸奶

Yaks have huge nostrils and eyes.

And of course, on a China-related scavenger hunt, this is obligatory:

squatty potty 厕所

squatty potty cesuo 厕所Apparently, Mabel’s most uttered phrase was “厕所在哪儿?” She got so many points from this!!

Occupational Hazards

[warning: graphic stick figure icon violence below.]

… of the Violin Maker:

Last time, Long-haired Luthier demonstrated an example of why we should follow safety precautions. Here are a handful of other warnings, dangers, and precautions one might take in violin making, as found sporadically in my construction notes.

violin maker occupational hazards

… of the CNC operator:

Now, for contrast, here are some warnings and dangers of operating the CNC lathe, posted on the Haas machine that I am training on.

danger and warnings associated with CNC

So much hurt…. These machines are NOT for messing around.

How many ways did poor icon man just get mangled up there? And all by itself on another side of the machine is one final enormous danger plaque :

do not leave stock extending out of the lathe, haas cnc lathe warning

W.

T.

F.

But seriously… you gotta respect these things. Maybe I ought to stick with hand tools after all.

Wedding Gift for Nora & Kevin, part 2

More pictures & process of making the inlaid tea tray. Check previous post for the rest.

STEP ONE: Join 3 pieces!

glue up rig for joining boards

STEP TWO: Plane it down til the boards are flat enough to lay out your design. Cut it out with a knife & ruler!

cut channel walls for inlay with knife and ruler

STEP THREE: Pick it out with a purfling pick! No routers or dremels if you want to be hardcore.

purfling pick makes inlay channel

STEP FOUR: Bend some walnut strips on the steaming iron so you can get those little tails to work! Trim, fit, and glue!

bocote + walnut inlay

STEP FIVE: Plane it flat! Why is my plane clogging and not working well? Maybe because it is hoarding shavings for the winter!

plane hoards shavings for the winter

STEP SEVEN: Cut out all the rest of the pieces, shape, rasp, file, scrape, and sand!

tea tray parts assembly

STEP EIGHT: Assemble!

tea tray wedding gift underside

Oh yeah, why did I make a tea tray, you ask? Originally, Nora asked me to make a sign to put next to the guestbook.

I got carried away.

But it is still a sign! The legs are cut at an angle to keep the tray’s center of mass where it needs to be to stand up like a sign.

angle for something to stand up on its side

Nora & Kevin : Sign has been sealed and delivered, it’s yours. Yall’s. Whatever. Happy Marriage!

tea tray wedding gift

Wedding Gift for Nora & Kevin

tea tray wedding gift for nora and kevin

My dear friend got married and I presented the couple an offering of tray-shaped wood. The tray is Bocote (which smells exactly like pickles when planed), the trim and legs are Goncalo Alves, and the inlaid letters are strips of walnut. Here’s what I learned from this project.

tea tray assembly axo

I made this up as I went, changing the plan five times a day. This is usually not recommended, but in the end, the schematics happened to work out beautifully. I have recently been obsessing over how to fasten tabletops to table aprons and how to handle joinery between boards with different grain orientation. The issue:

wood shrinkage and expansion across grain is greater than with grain

Wood happily expands and contracts (shut up, Omobono) with humidity and temperature. But it doesn’t shrink uniformly across all three dimensions. The biggest dimensional variation is ACROSS the rings of the tree, and the most stable dimension is along the length of the wood grain. The tea tray by nature is already subject to temp & moisture fluctuations – it might get washed, hot liquids might spill on it, it might live in Houston…. we must not let poor choice of joinery be another reason for warp:

expansion and contraction on wooden boards

Note: the downside of slot & pin is the ends of the crossing piece may not stay flush to the edge of the board. In the case of this tea tray, it is not functionally crucial that they stay flush. A cupped tray would be far worse. So basically, the board is sandwiched but can move freely between the differently-oriented legs and trim, and that trim piece is further held down in this sort of lap joint thing:

tea tray wedding gift joint detail

So, hopefully this will make sense now:

tea tray assembly axo - glue joints tea tray assembly axo - do not glue zones

More tray stuff to come on Wednesday!

Please feel free to comment if you’d like to elaborate on this wood expansion/contraction topic, pick on the design of this tray, commission something from me (yes! come on, pleeease 🙂 ?), or whatever!