
Perhaps you noticed, I missed a post or two! I am a busy girl now, with three out of four of these things active. So, I am shifting my update schedule to coincide with free evenings. From now on, it’s Mondays & Thursdays!
Perhaps you noticed, I missed a post or two! I am a busy girl now, with three out of four of these things active. So, I am shifting my update schedule to coincide with free evenings. From now on, it’s Mondays & Thursdays!
Don’t worry, yall, this is the last Golden Gate Bridge post… until its next birthday, maybe.
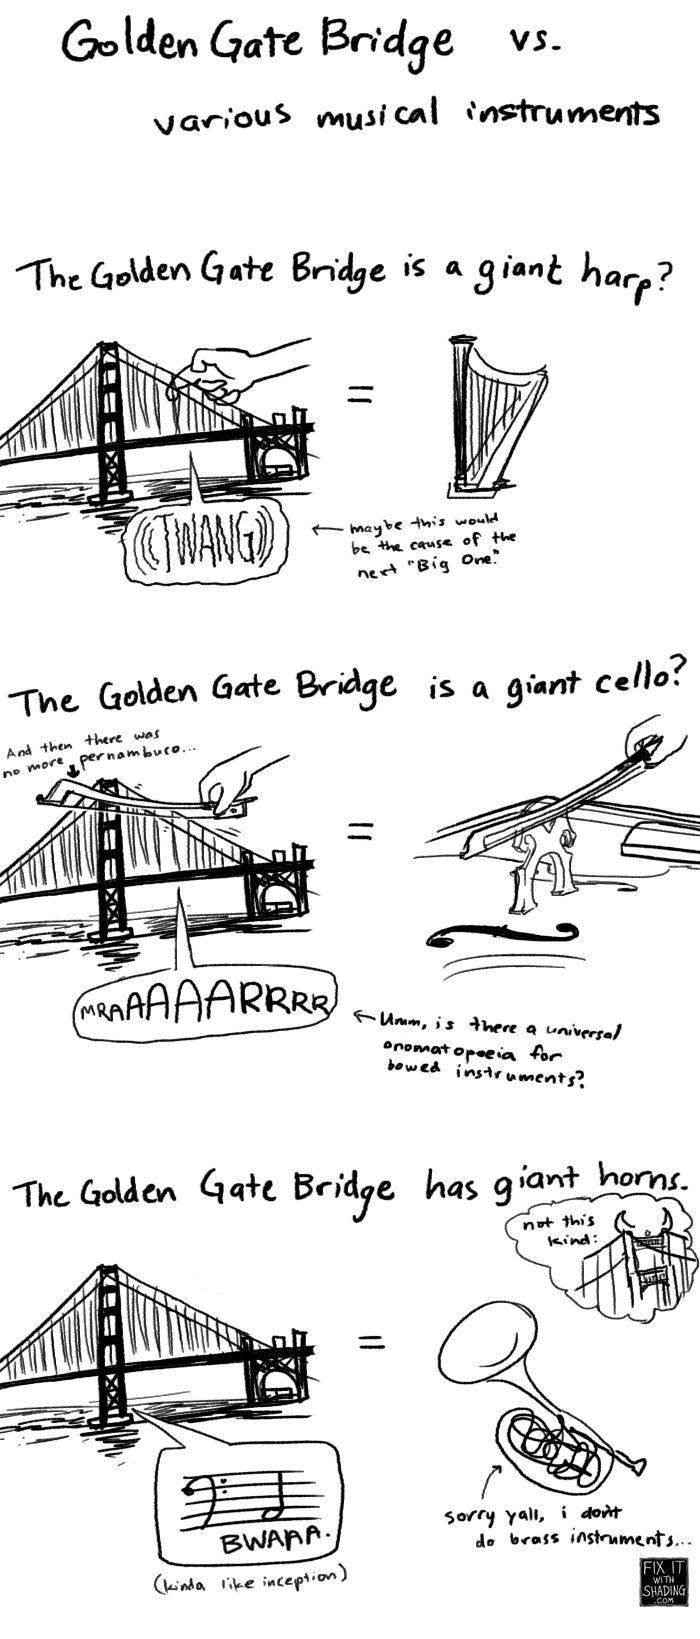
If you visit the Golden Gate Bridge and it is hiding, at least it will be serenading you with bassy fifths on its foghorns. So just sit back and enjoy the Golden Gate Bridge strip show.

In retrospect, I’m really glad that I chose to direct all my creepy photo-collecting, drawing, stalking, and obsessing at an inanimate object, and not a classmate. Well, the latter still happened… but let’s not digress.
To anyone who tried to tell me otherwise, admiration of an inanimate object is not completely futile. This bridge gave me goals and taught me to draw! (And maybe lost me some friends? Eh, totally worth it.)
So, let’s make fun of examine some of my Golden Gate Bridge fanart of over 10 years ago!

Happy Birthday, dear bridge! The Golden Gate Bridge turns 77 in a few days. If you’re out there in San Francisco, pay it a visit for me.
Back to school! Thankfully, I found my bass bar more or less the way I left it nearly a month ago. It’s all done and glued in now. Definitely not perfect, but a decent first attempt, I think.

This little animation explains the ridiculous challenge of the bass bar. You aren’t fitting it to just plop down and sit perfectly (though some people do?), you have to put it under a little tension. This means gradually over-cutting or lifting the ends of the bass bar, but still making sure the entire bar will make contact if you are pressing it into the plate. But you have to make sure that the way the bar contacts doesn’t twist your plate either! Just a few things to worry about. There’s probably only like a million other things too.
I glued up the bar yesterday and snapped some photos.
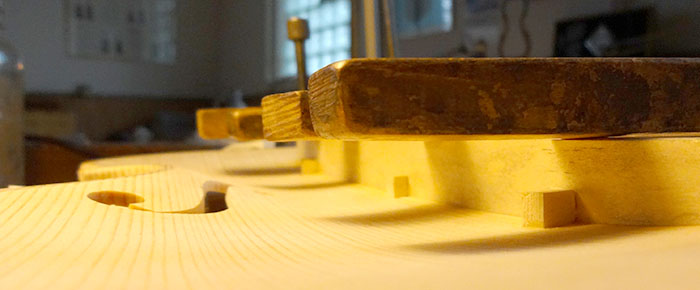
Those clamps. That bar. Those little cleats. The straight grain accentuating the topography of the spruce. All this inevitably leads me into….
Did you know that I was once a great master of Photoshopping horribly underdeveloped models into magical architectural wonderlands? I exaggerate only as much as an architectural rendering does. People ask me how I do it. The methodology is very very simple, but making a good rendering requires some pretty well-developed eye judgment. Kind of like violins… That said, let’s take the above photo and make a rather ridiculous rendering lacking in good judgment.


Other notes: I am a heavy user of Multiply, masks, brush and pattern presets, and Flickr. I am a very light user of layers. Keep that file light.
And remember, if anything’s looking off or ugly, or if something’s underdeveloped, or if you’re too lazy to solve some particular detail, you can always just FIX IT WITH SHADING!
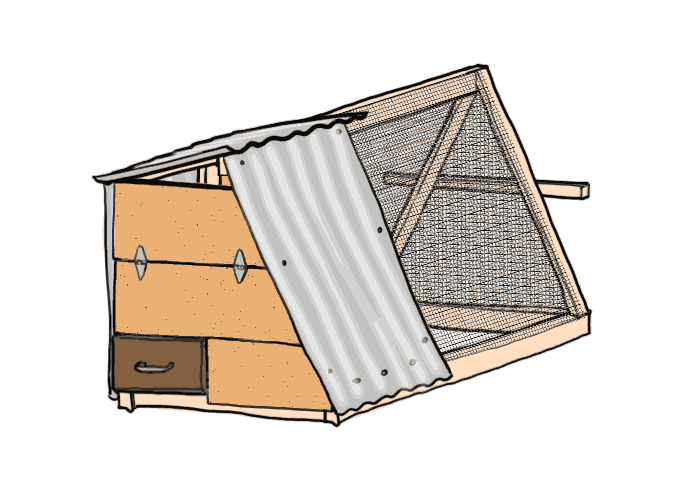
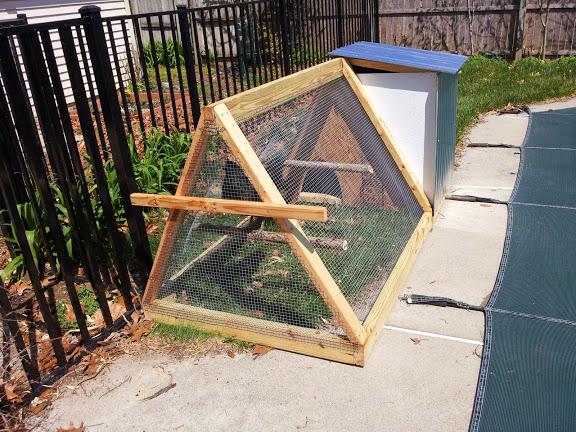
Today we discuss the making of the chicken tractor, without the drama.

The following chart is what it would cost, not what we paid. We spent a bit more (sorry, Max), because we bought extra of a few things (mainly OSB, due to errors and then design changes). Though we also made use of scrap or leftovers from previous projects.
| material | unit cost | quantity | subtotal |
|---|---|---|---|
| Pressure-treated 2×4, 12′ | $5.57 | 3 | $16.71 |
| 2×3, 8′ | $1.92 | 5 | $9.60 |
| OSB 7/16″, 4′ x 8′ | $8.45 | 1 | $8.45 |
| Corrugated Metal Roof Panel, 26″ x 8′ | $19.49 | 1 | $19.49 |
| 1″ Teks Roofing Screws with neoprene washers (box of 120) | $9.88 | 1 | $9.88 |
| 2.5″ Exterior Wood Screw (1 lb box) | $6.71 | 1 | $6.71 |
| 1″ Exterior Wood Screw (1 lb box) | $6.71 | 1 | $6.71 |
| 1/2″ Hardware Cloth, 3′ | ~$2.00 / lf | ~11 ft | ~$22.00 |
| 3″ Strap Hinges (pack of 2) | $3.27 | 1 | $3.27 |
| TOTAL | $102.82 |
(Nerd note: I’ve always wanted to use an html table in an appropriate context!!! ie not for formatting my angelfire/geocities pages 10 years ago!)
Other stuff we used that may or may not cost ya:
Chicken tractor construction, animated in gifs.

Floor size: 3′ x 6′
Height: ~3′
For 3 chickens, this is a bit on the small side.
The run area is 3′ x 4′.

That OSB wall and its little mini-studs were assembled before sliding into place on the A frame.

Tediously cut your hardware cloth with wire cutters. Careful! It’ll draw bloood. Staple directly onto the frame.
Roost access door is strap hinged.

This was our first experience with sawing through metal and using those Teks screws with built-in squishy stuff to prevent leaking through the roof.
We ripped this drawer from my sister’s old kitchen counters. The box itself is about 11″ x 18″.

The coop is a bit tight, but miraculously, even the puffball Buff Orpington can fit down the 8″ ramp, and through the tiny door (which is maybe an 10″ high triangle.)
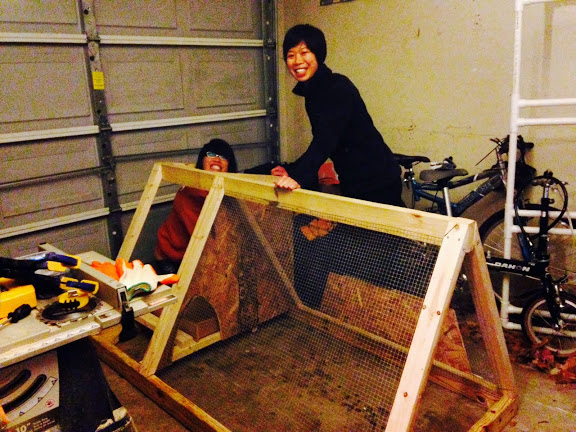
In case you forgot, it rained, so we took the job inside.

Peek-a-boo. See? The tiny door prevents human-sized predators from crawling in and attacking them in their chicken house at night.
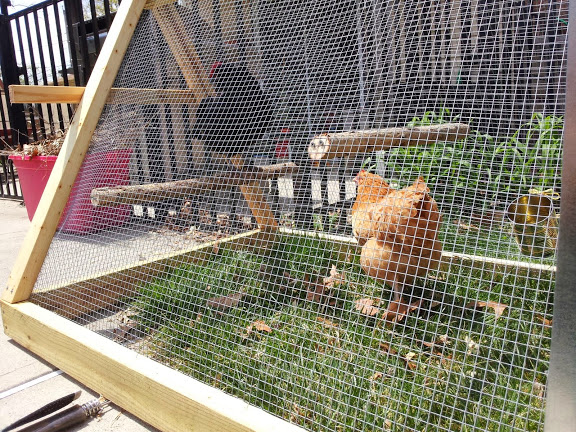
Ameraucana and Buff Orpington hanging out, and a shy Rhode Island Red hiding inside.
Ta-da! All nice and… half-primed.
I’m still on session break from violin-making school, so violin-related posts will resume next week. Can’t wait to see my möbius strip bass bar!
In the meantime, next post will STILL be about chickens — troubleshooting and accessories.
