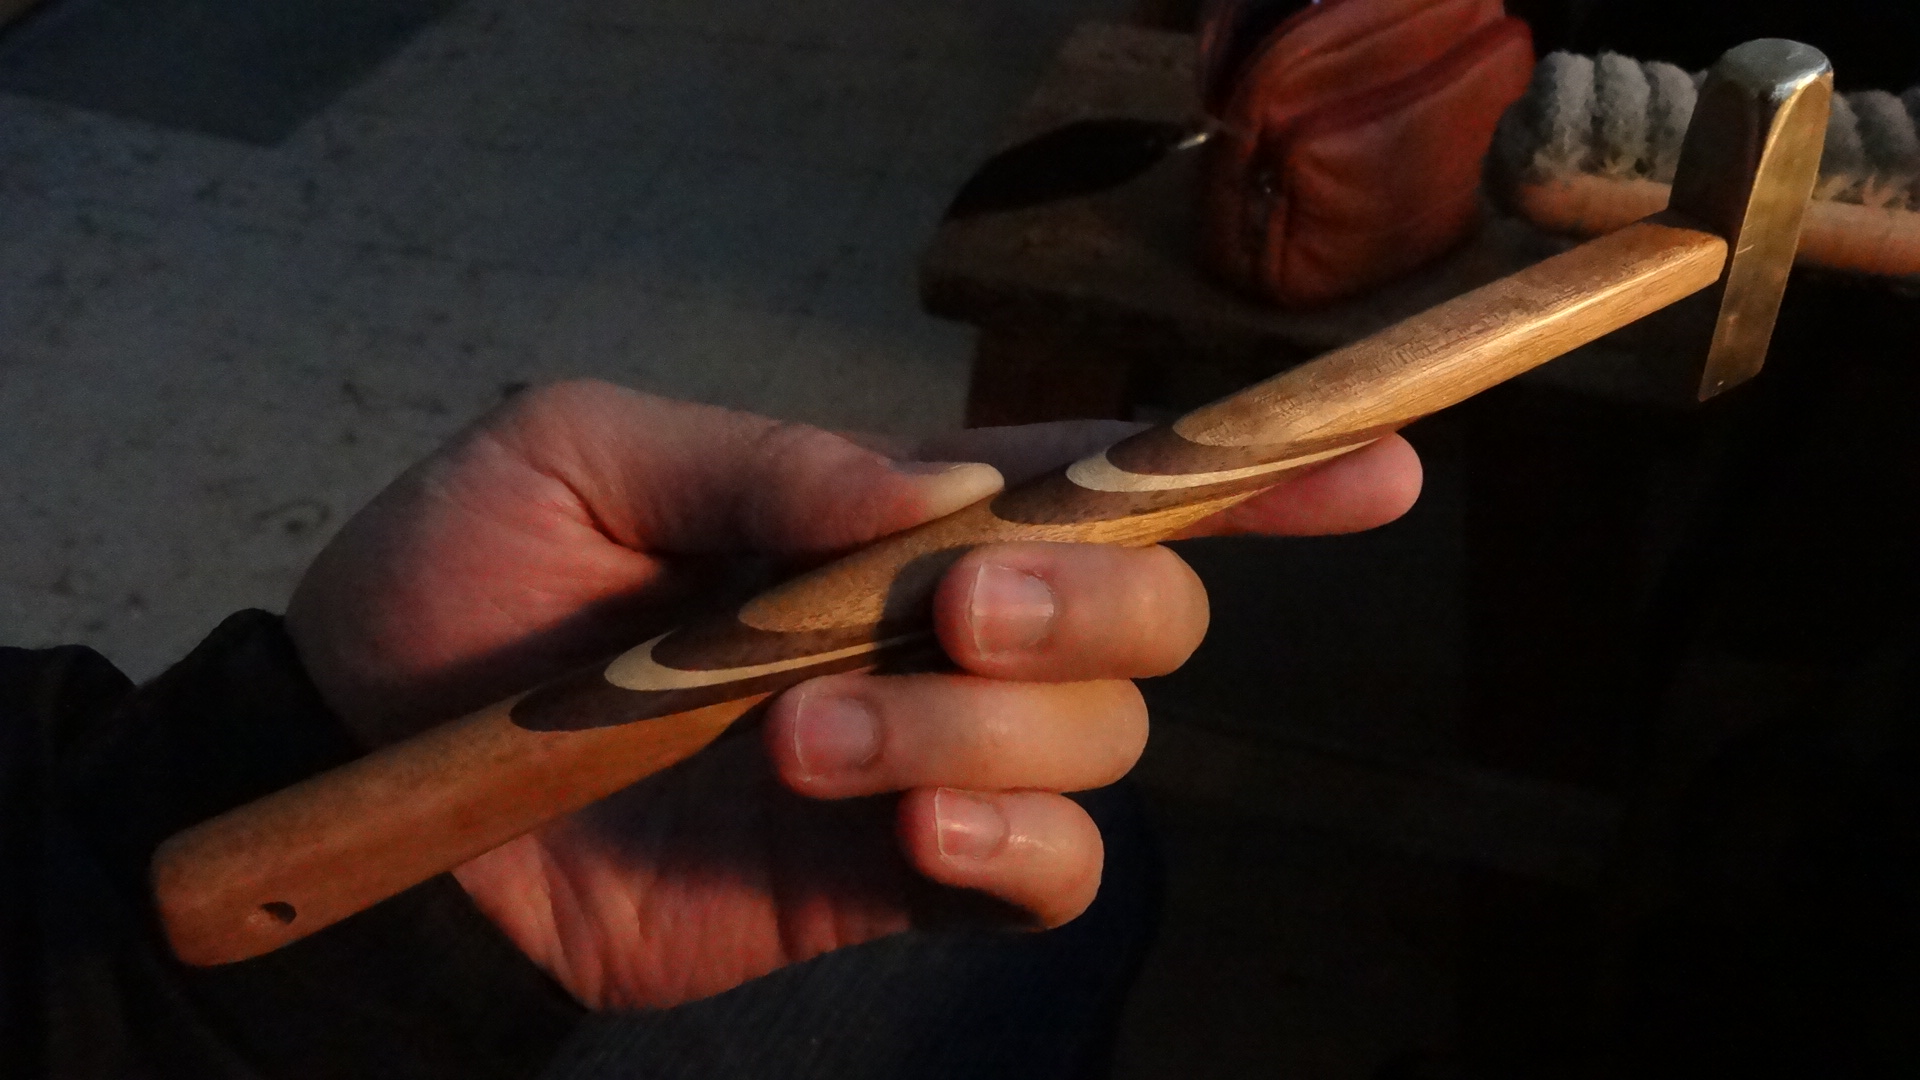
I made a brass hammer!
It is mystery cherry + walnut + maple, made out of leftover slivers of wood from my knife handles. Rounding the stick gives it the saturn rings.
By now, surely you want one too! Well here, I generously offer you instructions on making your own from the Great Violinmaking Notebook of MJ. Steps for laminating your own peanut butter cup racing stripes not included.

Normal people would use a stick of some nice hard wood that won’t break as you’re banging the hammer around. Abnormal people like me will add several steps of laminating little thin pieces of wood to achieve chocolate stripes. The length of the handle will depend on your hammer head. For my little ~1 cm hammer head, I suggest a handle around 20 cm long.
Score the stick to prevent tearout as you shape the end into a cylinder. The score line should be where the hammer head will sit.
Shape the end into a cylinder to fit the opening of the brass hammer head. Shave corners off up to the score line, alternating between scoring and removing material.
Stop when the shaped end can fit through the narrowest opening in the hammer head (my hammer head had a tapered hole drilled into it).
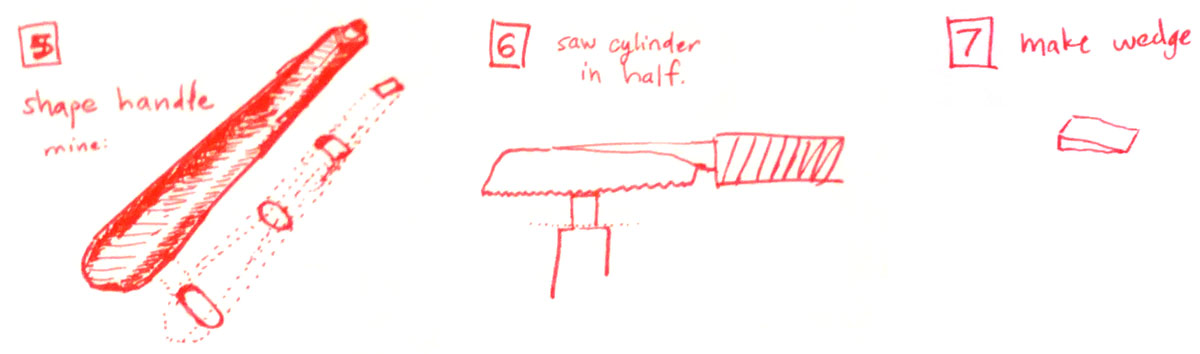
Shape the handle. I did not want mine completely round, but I wanted it round enough to make the cool effect with the rings. The result was flat ends blending with a round middle.
Saw the cylinder in half.
Make a wedge. It should be wide enough to make up the difference between the two ends of the hammer head’s tapered opening.

Mix epoxy. Even if you made a very snug joint, as long is it’s a cylinder, the hammer head will eventually want to spin on the handle. So we must fix it in place with epoxy.
Put epoxy in brass hammerhead hole.
Insert stick, clean off goopy mess. It should have squeezed some goo out.
Insert the wedge to pry the two halves of the cylinder apart, causing it to fill up the bigger end of the tapered hole.
Let it set for however long your epoxy’s instructions tell you it should sit for.